Showing posts with label Dynamics 365 for operations Retail. Show all posts

Sunday, 20 August 2017

Adding images to appear on POS screens for Dynamics 365 for operations-2

....contnd

you must have already gone through part 1 of the blog. if not, please go through that first before proceeding ahead.

3. Product images:
To make any changes to a image format, we will be using the attribute group "Default product attribute group". if you see the XML for Image, there are 5 different URL tags that are mapped. It simply means that we can have maximum of 5 images stored per product with the suffix of

/Products/ <ProductNumber>_000_001.jpg
/Products/ <ProductNumber>_000_002.jpg
/Products/ <ProductNumber>_000_003.jpg
/Products/ <ProductNumber>_000_004.jpg
/Products/ <ProductNumber>_000_005.jpg

"ProductNumber" here simply means the ItemId we have.

CPOS/MPOS will display same number of images as stored at Product folder

Service Volume(drive)>>Retail Server >>Webroot>>MediaServer >>Products

and product window will look like


Final URL for product will look like
https://*****devret.cloudax.dynamics.com/MediaServer/Products/81100_000_001.png


4. Category images:
"Default category attribute group" can be used to make any required change in format.

Category folder would be
Service Volume(drive)>>Retail Server >>Webroot>>MediaServer >>Categories

Default setup allows Retail server to display the category images by following the URL as
/Categories/{CategoryName}.png

However, if image has some different name or you want to display some other image irrespective of its name. you can follow the steps as mentioned below.

i.) Open product categories form as
Retail and commerce>>Products and categories>> product categories

ii.) Select category where you want to change the image as per your choice
iii). Then, click on Edit button.

iv.) Now, click on CATEGORY tab , it will show more options available under that.

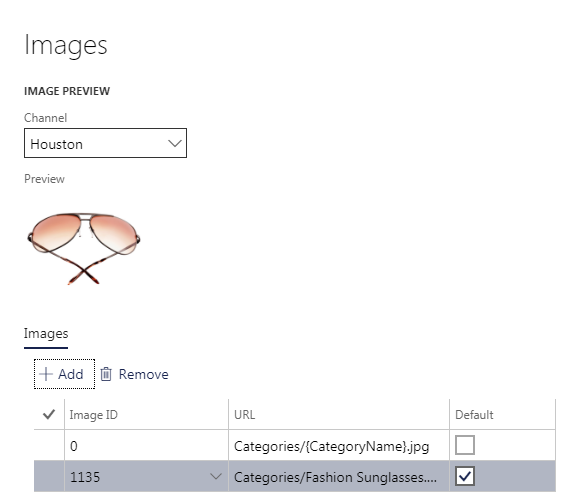
v.) Then click on images, it will open a separate form dialog as shown below.


Current image of Category is as


vi.)  Now, select the required channel and click on Add button. It will again show a popup dialog. I am taking a image as fashion sunglasses for now.
and then click on OK.

vii.) It will save the image as below. Make it default and click on OK.
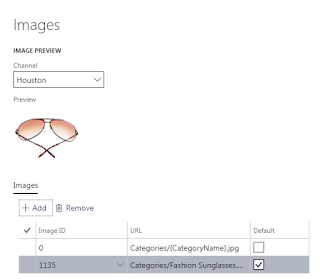
viii.) click SAVE on category form , run the distribution job 1040 and login to CPOS to see the effect.

final URL to check if image is appearing correctly would be something like this
https://*******devret.cloudax.dynamics.com/MediaServer/Categories/Fashion Sunglasses.png

It is recommended not to change default conventions available to store images. Change only when it is the last option.

That's it for now. Post your suggestions and questions if any.


Adding images to appear on POS screens for Dynamics 365 for operations-1

Ever came to situation when you need to add images for products, Customers, Workers and Categories to be displayed on Cloud POS(CPOS), Modern POS(MPOS), ecommerce site or mobile app or to share an image with some external application.

There is a pretty easy solution provided by MS to overcome all these scenarios easily and in very feasible manner.

1st and most important thing is, you need to identify the required image format or if required you can change the default format to other available formats(jpeg, jpg, gif, png, bmp).

Though the process is almost same for every group, I will proceed for each unit(Customer, Worker, Product and Category) separately.

1. Customer image:
Identify the required format of the image to be used by opening "Attribute groups" form as

Product information management>>setup>>Categories and attributes>>Attribute groups

Then, Select "Default customer attribute group" from left side window(filter), you will see form as below

It shows the attribute of selected attribute group. One of attributes is named as 'Image', we have to play around this only.
If you see the xml beside this, it contains logic that is used by CRT while getting an image for a Customer. So to get the image of a Customer, final URL would be like

<richmedialocationURL>/Customers/<CustomerNumber>.jpg

You can get the URL for richmedialocation as
Retail and commerce>>channel setup>>Channel profiles


So, what is the richmedialocation here. It is the physical path of the location on the D365 server to store media files for Retail.It can be navigated on server as

Service Volume(drive)>>Retail Server >>Webroot>>MediaServer

We 'll be using this path to store the images for entities win their respective groups.e.g., for Customer, we will store its images in path

Service Volume(drive)>>Retail Server >>Webroot>>MediaServer >>Customers

Back to Attribute, Click on Edit to see the default selected format and if required you can change it. A separate form will open as below

Clicking on Entity will show the groups where images can be stored. clicking on file extension will give all the possible formats that can be used to store the images at physical path on server.

If you are changing the file extension, click on OK button to save the changes and run the Distribution schedule job 1150 and 1040.

Let's test this and see if we are getting customer image.
I have a customer Id 004011, I took an image and placed in the previously mentioned Customer folder and renamed the image as 004011.jpg

Now, login to CPOS and search for the customer 004011 and get into the details of customer

Alternatively, you can try out the image URL in your browser to see the resulting image
https://*******devret.cloudax.dynamics.com/MediaServer/Customers/004011.jpg

Same URL can be used by external systems if required.

2. Worker image:
Worker image can also be saved using the same procedure as for Customers. Media server folder will then be Workers in that case

Service Volume(drive)>>Retail Server >>Webroot>>MediaServer >>Workers

and URL to get the worker image would be like
https://*****devret.cloudax.dynamics.com/MediaServer/Workers/000160.jpg

And on POS, it can be seen on top right corner of window.

"Default worker attribute group" can be used to do changes if required.

Although, most of the setup(attribute setup, image location) is similar for product and category images. There is a small change and additional setup required to be done in order to display the images correctly.

I'll explain remaining on my Next blog.

Saturday, 12 August 2017

Authorizing Dynamics 365 for Operations user to activate Cloud POS or Modern POS

I am going to show you today the steps to authorize a user to activate Cloud POS or Modern POS screens.
I am using Demo data set for this purpose and specifically USRT legal entity. I will be activating POS for HOUSTON store.

you can follow the same steps for own retail store and I assume that you already have sufficient knowledge to create Retail stores in D365O.

UserId: saddaf@Saddaftesttenant.onmicrosoft.com

In order to authorize this user for POS activation, it must be associated to a Worker.
So, open a worker from Retail and commerce Menu following a path as:

Retail and commerce >> Retail store financials >> Employees >> workers
Worker form will open as below

I am going to use Worker Alexander(000160) as it has managerial permissions. Non-manager workers like cashier can still login to POS but will not be able to activate it.
To check the permissions, click on POS permissions under Retail Tab. You can setup new user with manager permissions.


Click on Edit button on previous screen to see more information about worker. Please note that Address book of worker must include address book of store. In our case, Houston store has address book as 'houston' and so the worker 000160 contains in its address book as shown below.
This step is required for all workers who are required to log in to POS machines in Houston store.

Now, our next step is to assign a user to worker for signed activation of POS.
In above screen under external identity Tab, click on 'Associate existing identity'. You can also choose to create new identity, but that will be more tricky and so i'll try to cover it in future.
Clicking on 'Associate existing identity' button will open a form as shown below, usually it shows all created users, but you can also filter the user using email.

Now, click on OK button to associate the user with worker.
Then, open POS Devices form following a path as
Retail and commerce >> Channel setp >> POS setup >> Devices
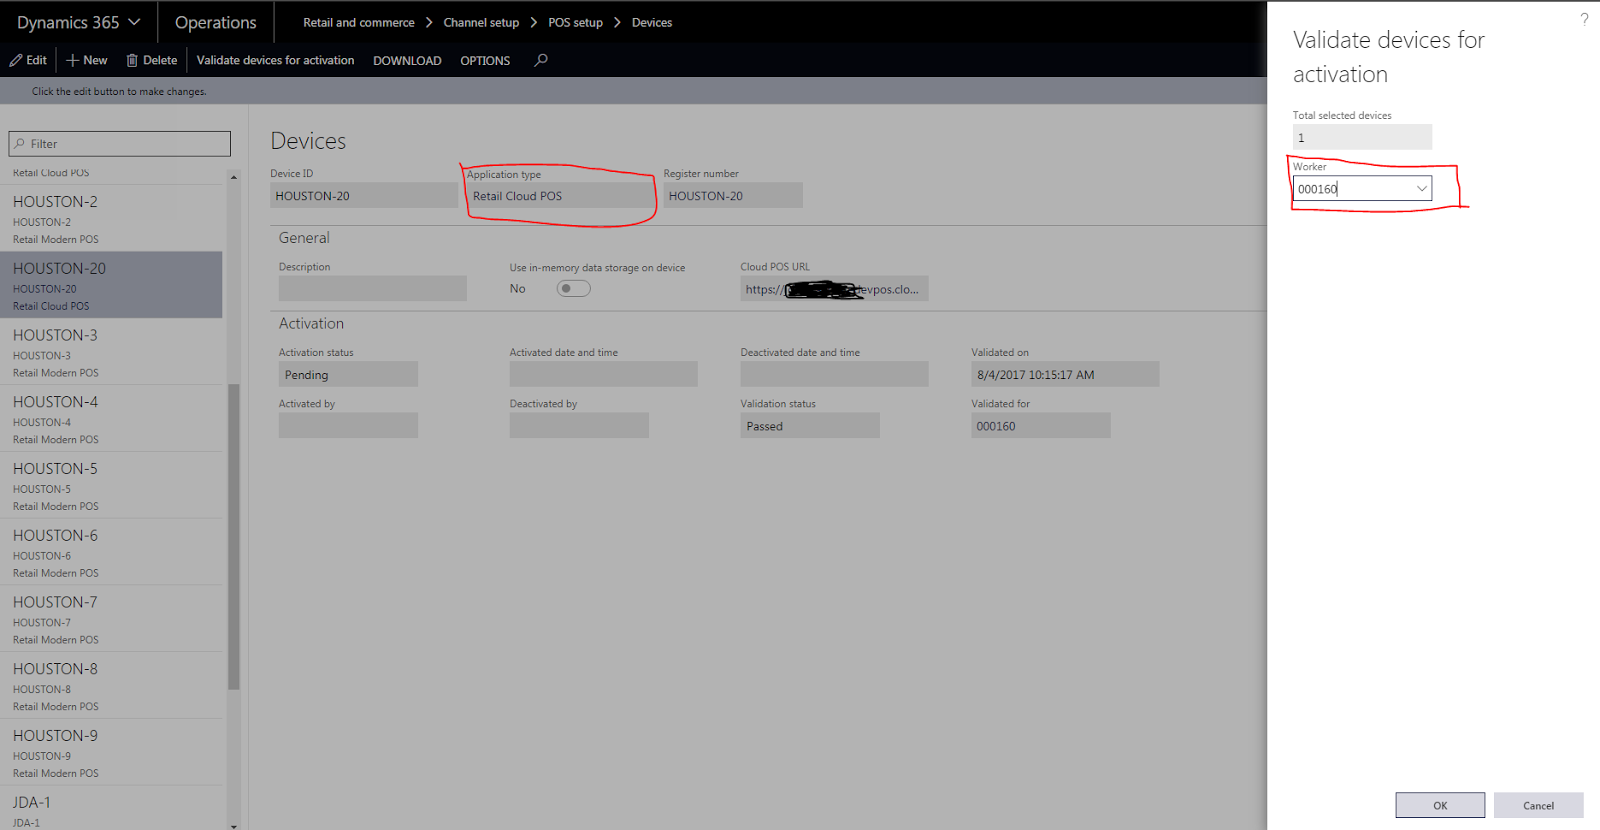
Select application type as required, I am going to activate Cloud POS for HOUSTON-20 as selected above. Now, click on "validate devices for activation" button to open validation screen as shown above and then select worker which we have setup in previous steps and click on OK.
You'll see the success message as shown below, if not then re-verify the previous steps.
Now we are ready to activate Cloud POS.

Open Cloud POS using provided URI in browser(edge browser is best supported). URI will look something as
https://<hostURI>devpos.cloudax.dynamics.com/

On clicking Next, It will ask you to provide authorized user credentials to proceed for activation screen. I'll be using same user as mentioned on top to get up to that screen.
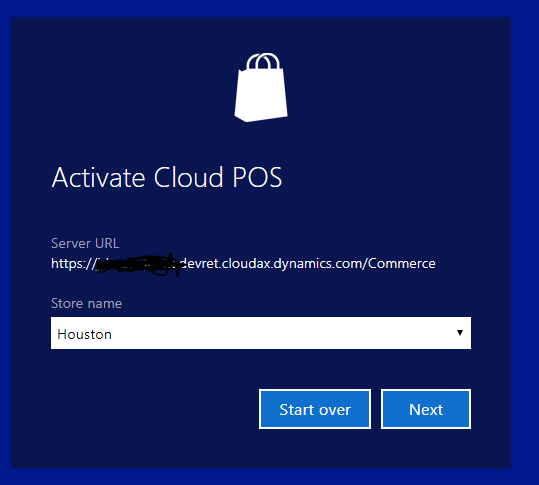
Retail server URL is filled automatically and will look like
https://<hostURI>devret.cloudax.dynamics.com/
Click on Next button to validate the URL and to retrive Stores automatically. you can opt to enter the these details manually. On the next screen, select store as 'HOUSTON' and click next.

Next screen will give away all Register-Devices combination that are available to activate. If you'll click on drop down, it will show all devices with status as Activated or Pending. We'll select HOUSTON-20
Then Final step is to Click on Activate button. It creates device token and collects all related configurations. You'll see the final screen as below.


Great, you have now activated the cloud POS. Let's see how it looks and what effects are done on D365O side.
Click on Get started button on above screen.

Kool, now enter worker credentials created in D365O(remember only workers which contains address book as 'houston' will be able to login here). You'll see the differences in POS screens/options for manager and non-manager roles. For 000160, default password is 123.

Kool, isn't it? Only internet connectivity and browser is required to activate Cloud POS(CPOS). It can be used on any kind of device be it Windows PC,Mac PC, Mobile, tablets.
Keep in mind,1 Device can only remain activated for 1 browser. Even, activating it in another browser on same machine will override the previous activation.

Now, move to D365O screen in Devices form and select HOUSTON-20.

You can see that Device status has been updated as 'Activated' with its Activation date&time and Activated by(worker id).

Thanks. Do share your thoughts or queries.